Admins can create courses based on their organization’s training requirements.
📒Note: Account admins can create courses for all app profiles across the organization, whereas app profile admins can create courses within the specific app profile to which they have admin access.
Create courses in two ways:
Create course
Create a course from scratch and customize it as required.
Navigate to Learning on the left pane.
The Learning home page opens, allowing you to view courses assigned to you or authored by others.
- At the top right, click Manage Resources, and then click Add.
The Manage Resources window displays a list of all courses, allowing you to filter courses based on those authored by you or others.
2. Select Create Course.
3. Type the course title.
If required, you can
- Upload the cover photo for the course.
- Type the course description.
4. Click Save.
The course is successfully created.
You are redirected to the course edit page, allowing you to manage the following:
Course details
Below the course title, perform the following to manage its details:
- Edit the author
- Add a co-author
- Specify the language and level
- Configure the compliance settings
- Add sections and units to the course
- Publish the course
📒Note: You can add co-authors for those who have admin permission. Learn more in the Add and manage authors.
All fields are in-line edits. Click a field to make the necessary changes.
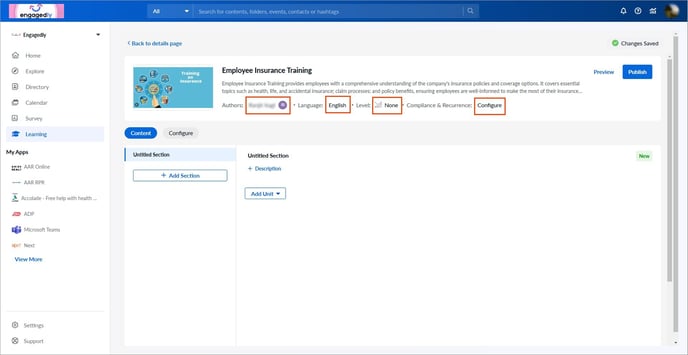
Course content
In the Content tab, add and manage the following:
- Sections to a course
- Units to a section
- Questions in a quiz
- Session in training
- Attendees in training
- Survey questions in learning
Course settings
In the Configure tab, configure the following settings:
- Add learner outcomes.
- Customize course completion behavior.
- Select Randomly or Sequentially, allowing learners to complete the units.
- Decide when the learners can mark the course as completed.
📒Note: If you enable "After manual evaluation", learners cannot mark the course as completed until you evaluate it. Evaluate learners in the "Evaluation Status" or "Scores" fields located in the "Learners" tab, which automatically marks their course status as completed.
- Enable Award certificate if required to award a certificate to learners after completing the course.
- Toggle the button to enable Comments, Ratings, or both.
The changes are auto-saved.
📒Notes:
- If you enable only ratings, learners must rate the course.
- If you enable only comments, learners must comment on the course.
- If both ratings and comments are enabled, learners must rate the course, but commenting is optional.
Utilize existing courses
Create a course from scratch or utilize the existing courses, updating them efficiently to align with organizational objectives, saving time and effort in the content development process.
Navigate to Learning on the left pane.
- At the top right, click Manage Resources, and then click Add.
- Select Utilise existing courses.
- Hover over the course and click Preview on the right to view its content if required.
- Select the course and click Use.
You are redirected to the course edit page, where you can manage the course details and content and configure settings.
During or after creating a course, configure its validity, recurrence, and compliance settings. Learn more in Enable course validity, recurrence, and compliance.
After creating a course, you must add sections and units to it. Learn more in Add and manage section and unit to course.
Once sections and units are added, you must publish the learning path and push it to the library. Learn more in Publish course.
After creating a course, manage it if required. Learn more in Manage course.