Employees can add events to the calendar to effectively organize activities, manage schedules, and ensure effective communication within the organization.
📒Note: You can add and manage events only if the account admin has given you edit access to the calendar.
Navigate to Calendar on the left pane.
Add event
- Select a calendar on the left and click Add Event at the top right.
- Click the drop-down and select a calendar to add the event.
- Type the event title and select the group, allowing its members to view the event.
- Set the event date and time and select the time zone.
The following options are optional:
5. Click BROWSE to upload an image.
6. Type the event description.
7. Enable Send Push Notification to receive notifications on the registered mobile.
8. Enable All Day Event to schedule a full-day event.
📒Note: If you enable the "All Day Event" option, the time selection is disabled.
9. Enable Show in Newsfeed, allowing the event to show up in the newsfeed.
📒Note: Events on the newsfeed are visible only to groups with view access.
10. Click Save.
The event is saved successfully. You can view it in its respective calendar.
Manage event
After creating the event, manage it if required.
- Select a calendar on the left and click an event on the calendar.
- Hover over the event.
- Click the Pen
 , Delete
  , or Plus
  Icon as required.
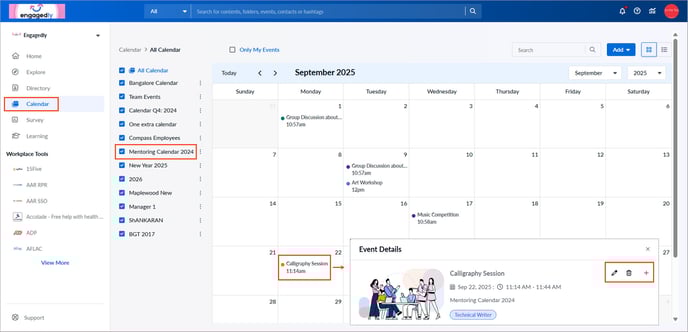
The plus icon allows you to add the event to Apple Calendar, Google, Yahoo, Outlook, or Office 365.
📒Note: You can add the event only to the calendars integrated with your organization.